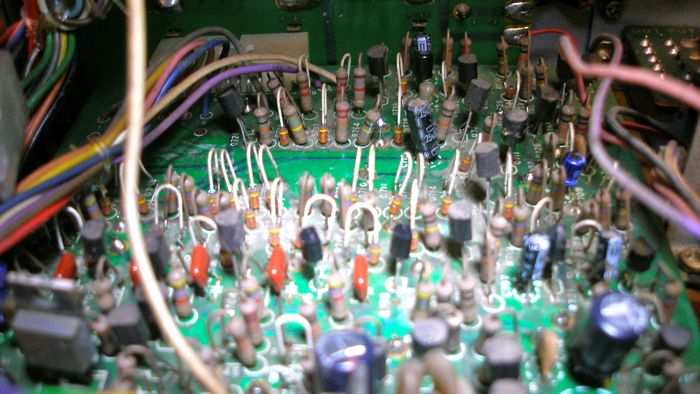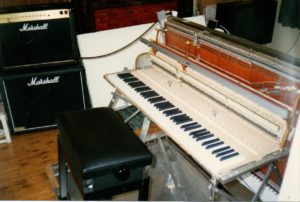
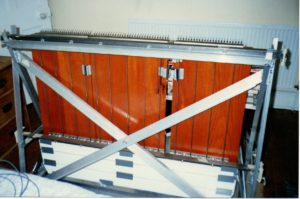
Is it a piano? Is it an electric guitar? Neither, it’s a hybrid! Keys, “action”, dampers from an upright piano, wood planks, electric guitar strings, and long pickup coils.
Watch and listen to a YouTube video of this instrument: https://youtu.be/pXIzCWyw8d4
Inception, designing and building
I first had the idea for the upright electric guitar in late 1986. At that time I had been scraping together a living for around 2 years, by hauling a 450-pound upright piano around to the shopping precincts in England, playing it as a street entertainer – and in my spare time I dreamt of having a keyboard instrument that would allow working with the sound of a “solid body” electric guitar. I especially liked the guitar sound of Angus Young from AC/DC, that of a Gibson SG. It had a lot of warmth in the tone, and whenever I heard any of their music, I kept thinking of all the things I might be able to do with that sound if it was available on a keyboard, such as developing new playing techniques. I had visions of taking rock music in new directions, touring, recording, and all the usual sorts of things an aspiring musician has on their mind.
Digital sampling was the latest development in keyboard technology back then, but I had found that samples of electric guitar did not sound authentic enough, even just in terms of their pure tone quality. Eventually all this led to one of those “eureka” moments in which it became clear that one way to get what I was after, would be to take a more “physical” approach by using a set of piano keys and the “action” and “dampering” mechanism that normally comes with them, and then, using planks of wood to mount on, swop out piano strings for those from an electric guitar, add guitar pickups, wiring and switches, and so on – and finally, to send the result of all this into a Marshall stack.
I spent much of the next 12 years working on some form of this idea, except for a brief interlude for a couple of years in the early 1990s, during which I collaborated with a firm based in Devon, Musicom Ltd, whose use of additive synthesis technology had led them to come up with the best artificially produced sounds of pipe organs that were available anywhere in the world. Musicom had also made some simple attempts to create other instrument sounds including acoustic piano, and the first time I heard one of these, in 1990, I was very impressed – it clearly had a great deal of the natural “warmth” of a real piano, warmth that was missing from any digital samples I had ever heard. After that first introduction to their technology and to the work that Musicom were doing, I put aside my idea for the physical version of the upright electric guitar for a time, and became involved with helping them with the initial analysis of electric guitar sounds.
Unfortunately, due to economic pressures, there came a point in 1992 when Musicom had to discontinue their research into other instrument sounds and focus fully on their existing lines of development and their market for the pipe organ sounds. It was at that stage that I resumed work on the upright electric guitar as a physical hybrid of an electric guitar and an upright piano.
I came to describe the overall phases of this project as “approaches”, and in this sense, all work done before I joined forces with Musicom was part of “Approach 1”, the research at Musicom was “Approach 2”, and the resumption of my original idea after that was “Approach 3”.
During the early work on Approach 1, my first design attempts at this new instrument included a tremolo or “whammy bar” to allow some form of note / chord bending. I made detailed 3-view drawings of the initial design, on large A2 sheets. These were quite complicated and looked like they might prove to be very expensive to make, and sure enough, when I showed them a light engineering firm, they reckoned it would cost around £5,000.00 for them to produce to those specifications. Aside from the cost, even on paper this design looked a bit impractical – it seemed like it might never stay in tune, for one thing.
Despite the apparent design drawbacks, I was able to buy in some parts during Approach 1, and have other work done, which would eventually be usable for Approach 3. These included getting the wood to be used for the planks, designing and having the engineering done on variations of “fret” pieces for all the notes the new instrument would need above the top “open E” string on an electric guitar, and buying a Marshall valve amp with a separate 4×12 speaker cabinet.
While collaborating with Musicom on the electronic additive synthesis method of Approach 2, I kept hold of most of the work and items from Approach 1, but by then I had already lost some of the original design drawings from that period. This is a shame, as some of them were done in multiple colours, and they were practically works of art in their own right. As it turned out, the lost drawings included features that I would eventually leave out of the design that resulted from a fresh evaluation taken to begin Approach 3, and so this loss did not stop the project moving forward.
The work on Approach 3 began in 1992, and it first involved sourcing the keys and action/dampering of an upright piano. I wanted to buy something new and “off the shelf”, and eventually I found a company based in London, Herrberger Brooks, who sold me one of their “Rippen R02/80” piano actions and key sets, still boxed up as it would be if sent to any company that manufactures upright pianos.
These piano keys and action came with a large A1 blueprint drawing that included their various measurements, and this turned out to be invaluable for the design work that had to be done next. The basic idea was to make everything to do with the planks of wood, its strings, pickups, tuning mechanism, frets, “nut”, machine heads and so on, fit together with, and “onto”, the existing dimensions of the piano keys and action – and to then use a frame to suspend the planks vertically, to add a strong but relatively thin “key bed” under the keys, legs under the key bed to go down to ground level and onto a “base”, and so on.
To begin work on designing how the planks would hold the strings, how those would be tuned, where the pickup coils would go and so on, I first reduced down this big blueprint, then added further measurements of my own, to the original ones. For the simplest design, the distance between each of the piano action’s felt “hammers” and the next adjacent hammer was best kept intact, and this determined how far apart the strings would have to be, how wide the planks needed to be, and how many strings would fit onto each plank. It looked like 3 planks would be required.
While working on new drawings of the planks, I also investigated what gauge of electric guitar string should be used for each note, how far down it would be possible to go for lower notes, and things related to this. With a large number of strings likely to be included, I decided it would be a good idea to aim for a similar tension in each one, so that the stresses on the planks and other parts of the instrument would, at least in theory, be relatively uniform. Some enquiries at the University of Bristol led me to a Dr F. Gibbs, who had already retired from the Department of Physics but was still interested in the behaviour and physics of musical instruments. He assisted with the equations for calculating the tension of a string, based on its length, diameter, and the pitch of the note produced on it. Plugging all the key factors into this equation resulted in a range of electric guitar string gauges that made sense for the upright electric guitar, and for the 6 open string notes found on a normal electric guitar, the gauges resulting from my calculations were similar to the ones your average electric guitarist might choose.
Other practicalities also determined how many more notes it would theoretically be possible to include below the bottom “open E” string on an electric guitar, for the new instrument. For the lowest note to be made available, by going all the way down to a 0.060 gauge wound string – the largest available at that time as an electric guitar string – it was possible to add several more notes below the usual open bottom E string. I considered using bass strings for notes below this, but decided not to include them and instead, to let this extra range be the lower limit on strings and notes to be used. Rather than a bass guitar tone, I wanted a consistent sort of electric guitar tone, even for these extra lower notes.
For the upper notes, everything above the open top E on a normal guitar would have a single fret at the relevant distance away from the “bridge” area for that string, and all those notes would use the same string gauge as each other.
The result of all the above was that the instrument would accommodate a total of 81 notes / strings, with an octave of extra notes below the usual guitar’s open bottom E string, and just under 2 octaves of extra notes above the last available fret from the top E string of a Gibson SG, that last fretted note on an SG being the “D” just under 2 octaves above the open top E note itself. For the technically minded reader, this range of notes went from “E0” to “C7”.
Having worked all this out, I made scale drawings of the 3 planks, with their strings, frets, pickup coils, and a simple fine-tuning mechanism included. It was then possible to manipulate a copy of the piano action blueprint drawing – with measurements removed, reduced in size, and reversed as needed – so it could be superimposed onto the planks’ scale drawings, to the correct relational size and so on. I did this without the aid of any computer software, partly because in those days, CAD apps were relatively expensive, and also because it was difficult to find any of this software that looked like I could learn to use it quickly. Since I had already drawn this to scale in the traditional way – using draftsman’s tools and a drawing board – it made sense to work with those drawings, so instead of CAD, I used photocopies done at a local printing shop, and reduced / reversed etc, as needed.
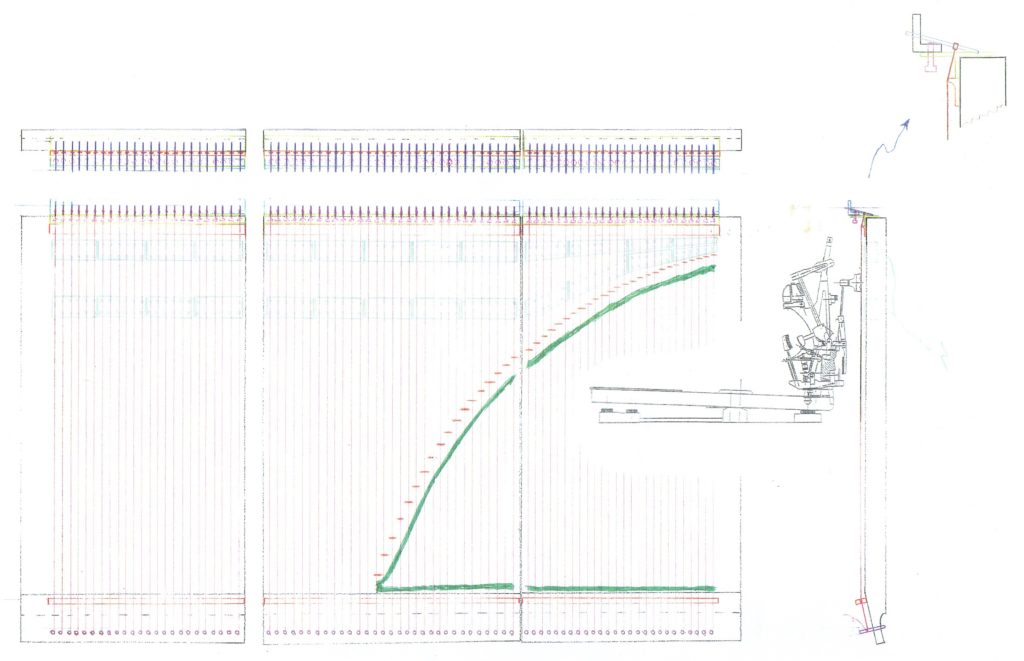
It was only really at this point, once the image of the piano action’s schematic was married up to the scale drawings of the 3 planks, that I began to fully understand where this work was heading, in terms of design. But from then on, it was relatively easily to come up with the rest of the concepts and to draw something for them, so that work could proceed on the frame to hold up the planks, the key bed, legs, and a base at ground level.
Around this time, I came across an old retired light engineer, Reg Huddy, who had a host of engineer’s machines – drill presses, a lathe, milling machine, and so on – set up in his home. He liked to make small steam engines and things of that nature, and when I first went to see him, we hit it off immediately. In the end he helped me make a lot of the metal parts that were needed for the instrument, and to machine in various holes and the pickup coil routing sections on the wood planks. He was very interested in the project, and as I was not very well off, he insisted in charging minimal fees for his work. Reg also had a better idea for the fine tuning mechanism than the one I had come up with, and we went with his version, as soon as he showed it to me.
If I am honest, I don’t think I would ever have finished the work on this project without all the help that Reg contributed. I would buy in raw materials if he didn’t already have them, and we turned out various parts as needed, based either on 3-view drawings I had previously come up with, or for other parts we realised would be required as the project progressed, from drawings I worked up as we went along. Reg sometimes taught me to use his engineering machinery, and although I was a bit hesitant at times, after a while I was working on these machines to a very basic standard.
I took the wood already bought for the instrument during the work on Approach 1, to Jonny Kinkead of Kinkade Guitars, and he did the cutting, gluing up and shaping to the required sizes and thicknesses for the 3 planks. The aim was to go with roughly the length of a Gibson SG neck and body, to make the planks the same thickness as an SG body, and to include an angled bit as usual at the end where an SG or any other guitar is tuned up, the “machine head” end. Jonny is an excellent craftsman and was able to do this work to a very high standard, based on measurements I provided him with.
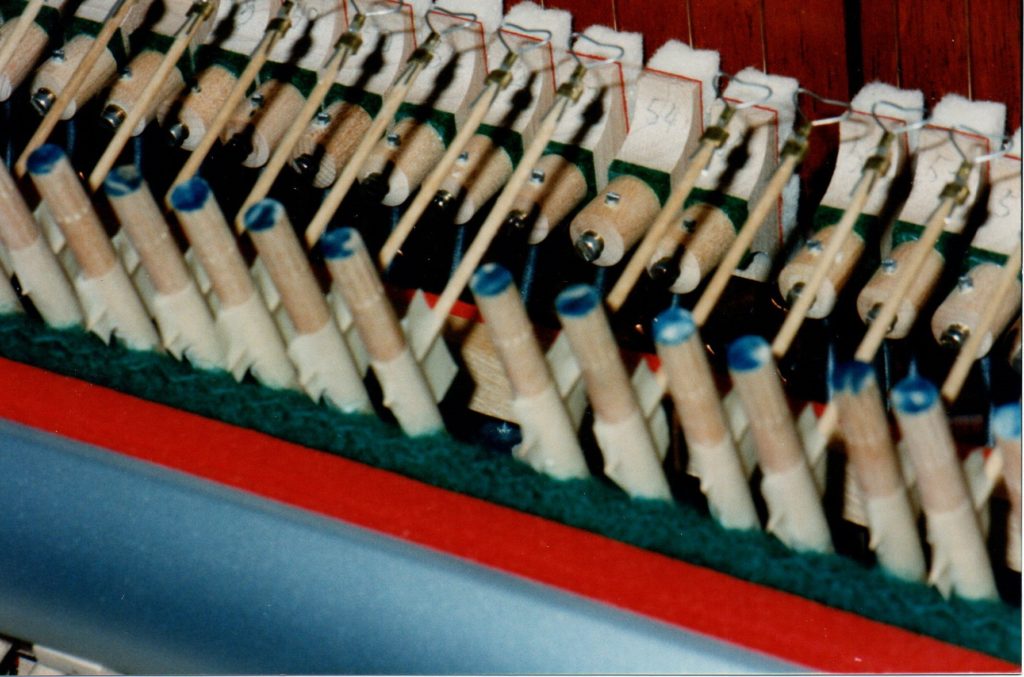
As well as getting everything made up for putting onto the planks, the piano action itself needed various modifications. The highest notes had string lengths that were so short that the existing dampers had to be extended so they were in the correct place, as otherwise they would not have been positioned over those strings at all. Extra fine adjustments were needed for each damper, so that instead of having to physically bend the metal rod holding a given damper in place – an inexact science at the best of times – it was possible to turn a “grub screw” to accomplish the same thing, but with a much greater degree of precision. And finally, especially important for the action, the usual felt piano “hammers” were to be replaced by smaller versions made of stiff wire shaped into a triangle. For these, I tried a few design mock-ups to find the best material for the wire itself, and to get an idea of what shape to use. Eventually, once this was worked out, I made up a “jig” around which it was possible to wrap the stiff wire so as to produce a uniformly shaped “striking triangle” for each note. This was then used to make 81 original hammers that were as similar to each other as possible. Although using the jig in this way was a really fiddly job, the results were better than I had expected, and they were good enough.
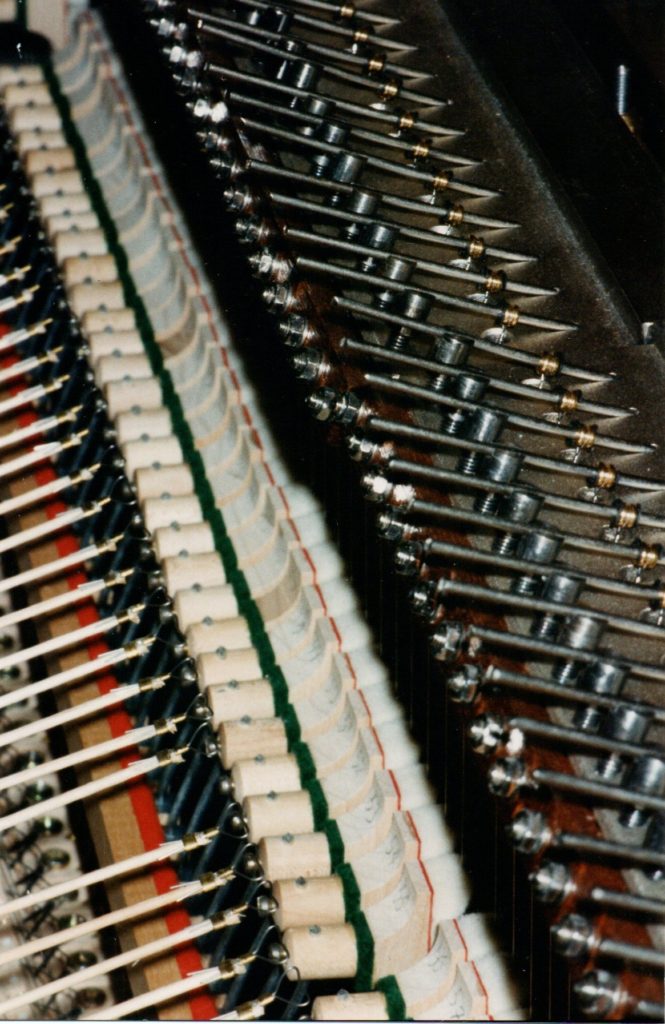
While this was all underway, I got in touch with an electric guitar pickup maker, Kent Armstrong of Rainbow Pickups. When the project first started, I had almost no knowledge of solid body electric guitar physics at all, and I certainly had no idea how pickup coils worked. Kent patiently explained this to me, and once he understood what I was doing, we worked out as practical a design for long humbucker coils as possible. A given coil was to go all the way across one of the 3 planks, “picking up” from around 27 strings in total – but for the rightmost plank, the upper strings were so short that there was not enough room to do this and still have both a “bridge” and a “neck” pickup, so the top octave of notes would had to have these two sets of coils stacked one on top of the other, using deeper routed areas in the wood than elsewhere.
For the signal to send to the amplifier, we aimed for the same overall pickup coil resistance (Ω) as on a normal electric guitar. By using larger gauge wire and less windings than normal, and by wiring up the long coils from each of the 3 planks in the right way, we got fairly close to this, for both an “overall bridge” and an “overall neck” pickup. Using a 3-way switch that was also similar to what’s found on a normal electric guitar, it was then possible to have either of these 2 “overall” pickups – bridge or neck – on by itself, or both at once. Having these two coil sets positioned a similar distance away from the “bridge end” of the strings as on a normal guitar, resulted in just the sort of sound difference between the bridge and neck pickups, as we intended. Because, as explained above, we had to stack bridge and neck coils on top of each other for the topmost octave of notes, those very high notes – much higher than on most electric guitars – did not sound all that different with the overall “pickup switch” position set to “bridge”, “neck”, or both at once. That was OK though, as those notes were not expected to get much use.
Some electric guitar pickups allow the player to adjust the volume of each string using a screw or “grub screw” etc. For the upright electric guitar I added 2 grub screws for every string and for each of the bridge and neck coils, and this means we had over 300 of these that had to be adjusted. Once the coils were ready, and after they were covered in copper sheeting to screen out any unwanted interference and they were then mounted up onto the planks, some early adjustments made to a few of these grub screws, and tests of the volumes of those notes, enabled working up a graph to calculate how much to adjust the height of each of the 300+ grub screws, for all 81 strings. This seemed to work quite well in the end, and there was a uniform change to volume from one end of the available notes to the other, one which was comparable to a typical electric guitar.
Unlike a normal electric guitar, fine tuning on this instrument was done at the “ball end” / “bridge end” of each string, not the “machine heads end” / “nut end”. The mechanism for this involved having a very strong, short piece of round rod put through the string’s “ball”, positioning one end of this rod into a fixed groove, and turning a screw using an allen key near the other end of the rod, to change the tension in the string. It did take a while to get this thing into tune, but I have always had a good ear, and over the years I had taught myself how to tune a normal piano, which is much more difficult than doing this fine tuning of the upright electric guitar instrument.
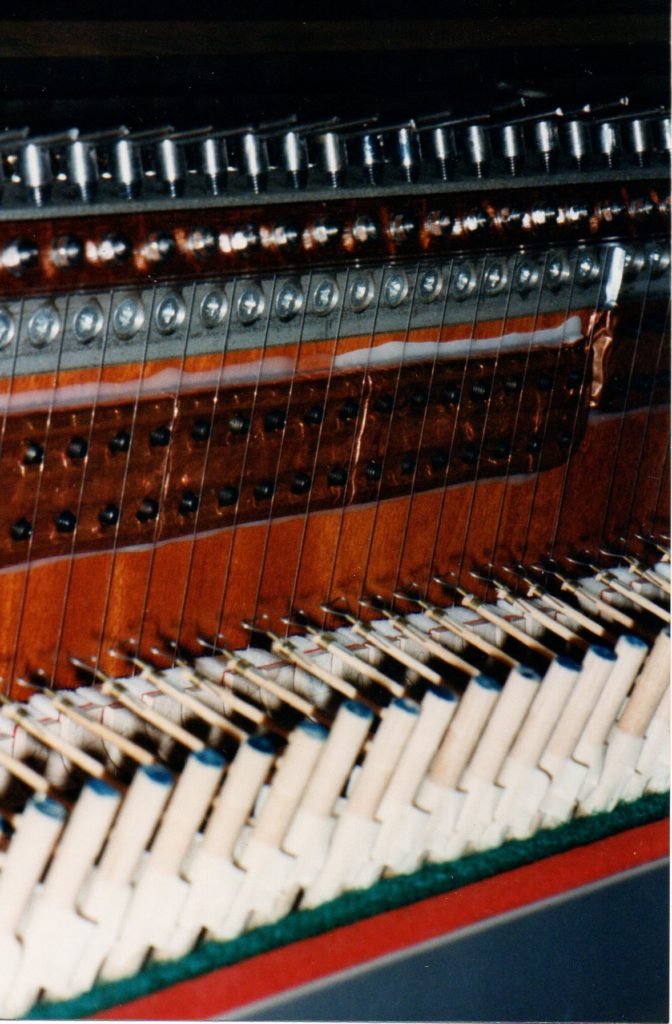
A frame made of aluminium was designed to support the 3 planks vertically. They were quite heavy on their own, and much more so with all the extra metal hardware added on, so the frame had to be really strong. Triangle shapes gave it extra rigidity. To offset the string tensions, truss rods were added on the back of the 3 planks, 4 per plank at equal intervals. When hung vertically, the 3 planks each had an “upper” end where the fine tuning mechanisms were found and near where the pickup coils were embedded and the strings were struck, and a “lower” end where the usual “nut” and “machine heads” would be found. I used short aluminium bars clamping each of 2 adjacent strings together in place of a nut, and zither pins in place of machine heads. The “upper” and “lower” ends of the planks were each fastened onto their own hefty piece of angle iron, which was then nestled into the triangular aluminium support frame. The result of this design was that the planks would not budge by even a tiny amount, once everything was put together. This was over-engineering on a grand scale, making it very heavy – but to my thinking at that time, this could not be helped.
The piano keys themselves also had to have good support underneath. As well as preventing sagging in the middle keys and any other potential key slippage, the “key bed” had to be a thin as possible, as I have long legs and have always struggled with having enough room for them under the keys of any normal piano. These 2 requirements – both thin and strong – led me to have some pieces of aluminium bar heat treated for extra strength. Lengths of this reinforced aluminium bar were then added “left to right”, just under the keys themselves, having already mounted the keys’ standard wooden supports – included in what came with the piano action – onto a thin sheet of aluminium that formed the basis of the key bed for the instrument. There was enough height between the keys and the bottom of these wooden supports, to allow a reasonable thickness of aluminium to be used for these left-to-right bars. For strength in the other direction of the key bed – “front to back” – 4 steel bars were added, positioned so that, as I sat at the piano keyboard, they were underneath but still out of the way. Legs made of square steel tubing were then added to the correct height to take this key bed down to a “base” platform, onto which everything was mounted. Although this key bed ended up being quite heavy in its own right, with the legs added it was as solid as a rock, so the over-engineering did at least work in that respect.
If you have ever looked inside an upright piano, you might have noticed that the “action” mechanism usually has 2 or 3 large round nuts you can unscrew, after which it is possible to lift the whole mechanism up and out of the piano and away from the keys themselves. On this instrument, I used the same general approach to do the final “marrying up” – of piano keys and action, to the 3 planks of wood suspended vertically. The existing action layout already had “forks” that are used for this, so everything on the 3 planks was designed to allow room for hefty sized bolts fastened down tightly in just the right spots, in relation to where the forks would go when the action was presented up to the planks. The bottom of a normal upright piano action fits into “cups” on the key bed, and I also used these in my design. Once the planks and the key bed were fastened down to the aluminium frame and to the base during assembly, then in much the same way as on an upright piano, the action was simply “dropped down” into the cups, then bolted through the forks and onto, in this case, the 3 planks.
It’s usually possible to do fine adjustments to the height of these cups on an upright piano, and it’s worth noting that even a tiny change to this will make any piano action behave differently. This is why it was so important to have both very precise tolerances in the design of the upright electric guitar’s overall structure, together with as much strength and rigidity as possible for the frame and other parts.
With a normal upright piano action, when you press a given key on the piano keyboard, it moves the damper for that single note away from the strings, and the damper returns when you let go of that key. In addition to this, a typical upright piano action includes a mechanism for using a “sustain pedal” with the right foot, so that when you press the pedal, the dampers are pushed away from all the strings at the same time, and when you release the pedal, the dampers are returned back onto all the strings. The upright piano action bought for this instrument did include all this, and I especially wanted to take advantage of the various dampering and sustain possibilities. Early study, drawing and calculations of forces, fulcrums and so on, eventually enabled use of a standard piano sustain foot pedal – bought off the shelf from that same firm, Herrberger Brooks – together with a hefty spring, some square hollow aluminium tube for the horizontal part of the “foot to dampers transfer” function, and a wooden dowel for the vertical part of the transfer. Adjustment had to be made to the position of the fulcrum, as the first attempt led to the foot pedal needing too much force, which made it hard to operate without my leg quickly getting tired. This was eventually fixed, and then it worked perfectly.
At ground level I designed a simple “base” of aluminium sheeting, with “positioners” fastened down in just the right places so that the legs of the key bed, the triangular frame holding up the 3 planks, and the legs of the piano stool to sit on, always ended up in the correct places in relation to each other. This base was also where the right foot sustain pedal and its accompanying mechanism were mounted up. To make it more transportable, the base was done in 3 sections that could fairly easily be fastened together and disassembled.
After building – further tests and possible modifications
When all this design was finished, all the parts were made and adjusted as needed, and it could finally be assembled and tried out, the first time I put the instrument together, added the wiring leads, plugged it into the Marshall stack, and then tuned it all up, it was a real thrill to finally be able to sit and play it. But even with plenty of distortion on the amp, it didn’t really sound right – it was immediately obvious that there was too much high frequency in the tone. It had wonderful amounts of sustain, but the price being paid for this was that the sound was some distance away from what I was really after. In short, the instrument worked, but instead of sounding like a Gibson SG – or any other electric guitar for that matter – it sounded a bit sh***y.
When I had first started working on this project, my “ear” for what kind of guitar sound I wanted, was in what I would describe as an “early stage of development”. Mock-up tests done during Approach 1, before 1990, had sounded kind of right at that time. But once I was able to sit and play the finished instrument, and to hear it as it was being played, with hindsight I realised that my “acceptable” evaluation of the original mock-up was more because, at that point, I had not yet learned to identify the specific tone qualities I was after. It was only later as the work neared completion, that my “ear” for the sound I wanted became more fully developed, as I began to better understand how a solid body electric guitar behaves, what contributes to the tone qualities you hear from a specific instrument, and so on.
I began asking some of the other people who had been involved in the project, for their views on why it didn’t sound right. Two things quickly emerged from this – it was too heavy, and the strings were being struck, instead of plucking them.
Kent Armstrong, who made the pickups for the upright electric guitar, told me a story about how he once did a simple experiment which, in relation to my instrument, demonstrated what happens if you take the “it’s too heavy” issue to the extreme. He told me about how he had once “made an electric guitar out of a brick wall”, by fastening an electric guitar string to the wall at both ends of the string, adding a pickup coil underneath, tuning the string up, sending the result into an amp, and then plucking the string. He said that this seemed to have “infinite sustain” – the sound just went on and on. His explanation for this was that because the brick wall had so much mass, it could not absorb any of the vibration from the string, and so all of its harmonics just stayed in the string itself.
Although this was a funny and quite ludicrous example, I like this kind of thing, and the lesson was not lost on me at the time. We discussed the principles further, and Kent told me that in his opinion, a solid body electric guitar needs somewhere around 10 to 13 pounds of wood mass, in order for it to properly absorb the strings’ high harmonics in the way that gives you that recognisable tone quality we would then call “an electric guitar sound”. In essence, he was saying that the high frequencies have to “come out”, and then it’s the “warmer” lower harmonics which remain in the strings, that makes an electric guitar sound the way it does. This perfectly fit with my own experience of the tones I liked so much, in a guitar sound I would describe as “desirable”. Also, it did seem to explain why my instrument, which had a lot more “body mass” than 10 to 13 pounds – with its much larger wood planks, a great deal of extra hardware mounted onto them, and so on – did not sound like that.
As for striking rather than plucking the strings, I felt that more trials and study would be needed on this. I had opted to use hammers to strike the strings, partly as this is much simpler to design for – the modifications needed to the upright piano action bought off the shelf, were much less complicated than those that would have been required for plucking them. But there was now a concern that the physics of plucking and striking might be a lot different to each other, and if so there might be no way of getting around this, except to pluck them.
I decided that in order to work out what sorts of changes would best be made to the design of this instrument to make it sound better, among other things to do as a next step, I needed first-hand experience of the differences in tone quality between various sizes of guitar body. In short, I decided to make it my business to learn as much as I could about the physics of the solid body electric guitar, and if necessary, to learn more than perhaps anyone else out there might already know. I also prepared for the possibility that a mechanism to pluck the strings might be needed.
At that time, in the mid 1990s, there had been some excellent research carried out on the behaviour of acoustic guitars, most notably by a Dr Stephen Richardson at the University of Cardiff. I got in touch with him, and he kindly sent me details on some of this work. But he admitted that the physics of the acoustic guitar – where a resonating chamber of air inside the instrument plays a key part in the kinds of sounds and tones that the instrument can make – is fundamentally different to that of a solid body electric guitar.
I trawled about some more, but no one seemed to have really studied solid body guitar physics – or if they had, nothing had been published on it. Kent Armstrong’s father Dan appeared on the scene at one point, as I was looking into all this. Dan Armstrong was the inventor of the Perspex bass guitar in the 1960s. When he, Kent and I all sat down together to have a chat about my project, it seemed to me that Dan might in fact know more than anyone else in the world, about what is going on when the strings vibrate on a solid body guitar. It was very useful to hear what he had to say on this.
I came away from all these searches for more knowledge, with further determination to improve the sound of the upright electric guitar. I kept an eye out for a cheap Gibson SG, and as luck would have it, one appeared online for just £400.00 – for any guitar enthusiasts out there, you will know that even in the 1990s, that was dirt cheap. I suspected there might be something wrong with it, but decided to take a risk and buy it anyway. It turned out to have a relatively correct SG sound, and was cheap because it had been made in the mid 1970s, at a time when Gibson were using inferior quality wood for the bodies of this model. While it clearly did not sound as good as, say, a vintage SG, it was indeed a Gibson original rather than an SG copy, and it did have a “workable” SG sound that I could compare against.
I also had a friend with a great old Gibson SG Firebrand, one that sounded wonderful. He offered to let me borrow it for making comparative sound recordings and doing other tests. I was grateful for this, and I did eventually take him up on the offer.
One thing that I was keen to do at this stage, was to look at various ways to measure – and quantify – the differences in tone quality between either of these two Gibson SGs and the upright electric guitar. I was advised to go to the Department of Mechanical Engineering at the University of Bristol, who were very helpful. Over the Easter break of 1997, they arranged for me to bring in my friend’s SG Firebrand and one of my 3 planks – with its strings all attached and working – so that one of their professors, Brian Day, could conduct “frequency sweep” tests on them. Brian had been suffering from early onset of Parkinson’s disease and so had curtailed his normal university activities, but once he heard about this project, he was very keen to get involved. Frequency sweep tests are done by exposing the “subject” instrument to an artificially created sound whose frequency is gradually increased, while measuring the effect this has on the instrument’s behaviour. Brian and his colleagues carried out the tests while a friend and I assisted. Although the results did not quite have the sorts of quantifiable measurements I was looking for, they did begin to point me in the right direction.
After this testing, someone else recommended I get in touch with a Peter Dobbins, who at that time worked at British Aerospace in Bristol and had access to spectral analysis equipment at their labs, which he had sometimes used to study the physics of the hurdy gurdy, his own personal favourite musical instrument. Peter was also very helpful, and eventually he ran spectral analysis of cassette recordings made of plucking, with a plectrum, the SG Firebrand, the completed but “toppy-sounding” upright electric guitar, and a new mock-up I had just made at that point, one that was the same length as the 3 planks, but only around 4 inches wide. This new mock-up was an attempt to see whether using around 12 or 13 much narrower planks in place of the 3 wider ones, might give a sound that was closer to what I was after.
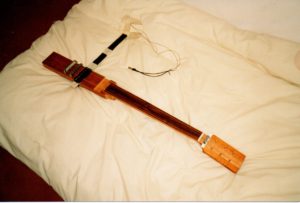
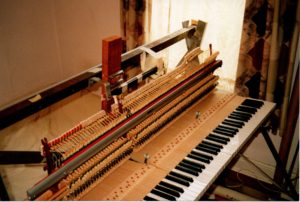
Mock-up of possible alternative to 3 planks – would 12 or 13 of these sound better instead? Shown on its own (with a long test coil), and mounted up to the keys and action setup so that plucking tests could make use of the dampers to stop strings moving between recordings of single notes
As it turned out, the new mock-up did not sound that much different to the completed upright electric guitar itself, when the same note was plucked on each of them. It was looking like there was indeed a “range” of solid guitar body mass / weight of wood that gave the right kind of tone, and that even though the exact reasons for the behaviour of “too much” or “too little” mass might be different to each other, any amount of wood mass / weight on either side of that range, just couldn’t absorb enough of the high harmonics out of the strings. Despite the disappointing result of the new mock-up sounding fairly similar to the completed instrument, I went ahead and gave Peter the cassette recordings of it, of the completed instrument, and of my friend’s SG Firebrand, and he stayed late one evening at work and ran the spectral analysis tests on all of these.
Peter’s spectral results were just the kind of thing I had been after. He produced 3D graphs that clearly showed the various harmonics being excited when a given string was plucked, how loud each one was, and how long they went on for. This was a pictorial, quantitative representation of the difference in tone quality between my friend’s borrowed SG Firebrand, and both the completed instrument and the new mock-up. The graphs gave proper “shape” and “measure” to these differences. By this time, my “ear” for the sort of tone quality I was looking for, was so highly developed that I could distinguish between these recordings immediately, when hearing any of them. And what I could hear, was reflected precisely on these 3D graphs.
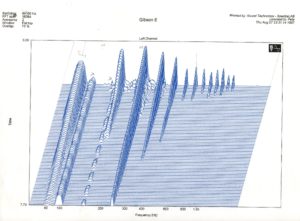
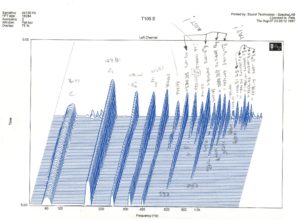
Spectral analysis graphs in 3D, of Gibson SG Firebrand “open bottom E” note plucked, and the same note plucked on the upright electric guitar. Frequency in Hz is on the x axis and time on the y axis, with time starting at the “back” and moving to the “front” on the y axis. Harmonics are left-to-right on each graph – leftmost is the “fundamental”, then 1st harmonic etc. Note how many more higher harmonics are found on the right graph of the upright electric guitar, and how they persist for a long time. I pencilled in frequencies for these various harmonics on the graph on the right, while studying it to understand what was taking place on the string.
While this was all underway, I also mocked up a few different alternative types of hammers and carried out further sound tests to see what sort of a difference you would get in tone, from using different materials for these, but always still striking the string. Even though I was more or less decided on moving to a plucking mechanism, for completeness and full understanding, I wanted to see if any significant changes might show up from using different sorts of hammers. For these experiments, I tried some very lightweight versions in plastic, the usual felt upright piano hammers, and a couple of others that were much heavier, in wood. Not only was there almost no difference whatsoever between the tone quality that each of these widely varied types of hammers seemed to produce, it also made next to no difference where, along the string, you actually struck it.
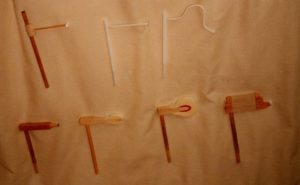
These experiments, and some further discussions with a guitar maker who had helped out on the project, brought more clarification to my understanding of hammers vs plucking. Plucking a string seems to make its lower harmonics get moving right away, and they then start out with more volume compared to that of the higher harmonics. The plucking motion will always do this, partly because there is so much energy being transferred by the plectrum or the player’s finger – and this naturally tends to drive the lower harmonics more effectively. When you hit a string with any sort of hammer though, the effect is more like creating a sharp “shock wave” on the string, but one with much less energy. This sets off the higher harmonics more, and the lower ones just don’t get going properly.
In a nutshell, all of this testing and research confirmed the limitations of hammers, and the fact that there are indeed fundamental differences between striking and plucking an electric guitar string. Hammers were definitely “out”.
To summarise the sound characteristic of the upright electric guitar, its heavy structure and thereby the inability of its wood planks to absorb enough high frequencies out of the strings, made it naturally produce a tone with too many high harmonics and not enough low ones – and hitting its strings with a hammer instead of plucking, had the effect of “reinforcing” this tonal behaviour even more, and in the same direction.
The end?
By this point in the work on the project, as 1998 arrived and we got into spring and summer of that year, I had gotten into some financial difficulties, partly because this inventing business is expensive. Despite having built a working version of the upright electric guitar, even aside from the fact that the instrument was very heavy and took some time to assemble and take apart – making it impractical for taking on tour for example – the unacceptable sound quality alone, meant that it was not usable. Mocked-up attempts to modify the design so that there would be many planks, each quite narrow, had not improved the potential of the sound to any appreciable degree, either.
I realised that I was probably reaching the end of what I could achieve on this project, off my own back financially. To fully confirm some of the test results, and my understanding of what it is that makes a solid body electric guitar sound the way it does, I decided to perform a fairly brutal final test. To this end, I first made recordings of plucking the 6 open strings on the cheap SG I had bought online for £400.00. Then I had the “wings” of this poor instrument neatly sawn off, leaving the same 4-inch width of its body remaining, as the new mock-up had. This remaining width of 4 inches was enough that the neck was unaffected by the surgery, which reduced the overall mass of wood left on the guitar, and its shape, down to something quite similar to that of the new mock-up.
I did not really want to carry out this horrible act, but I knew that it would fully confirm all the indications regarding the principles, behaviours and sounds I had observed in both the 3 planks of the completed upright electric guitar, in the new mock-up, and in other, “proper” SG guitars that, to my ear, sounded right. If, by doing nothing else except taking these lumps of wood mass away from the sides of the cheap SG, its sound went from “fairly good” to “unacceptably toppy”, it could only be due to that change in wood mass.
After carrying out this crime against guitars by chopping the “wings” off, I repeated the recordings of plucking the 6 open strings. Comparison to the “before” recordings of it, confirmed my suspicions – exactly as I had feared and expected, the “after” sound had many more high frequencies in it. In effect I had “killed” the warmth of the instrument, just by taking off those wings.
In September 1998, with no more money to spend on this invention, and now clear that the completed instrument was a kind of “design dead end”, I made the difficult decision to pull the plug on the project. I took everything apart, recycled as many of the metal parts as I could (Reg Huddy was happy to have many of these), gave the wood planks to Jonny Kinkead for him to use to make a “proper” electric guitar with as he saw fit, and then went through reams of handwritten notes, sketches and drawings from 12 years of work, keeping some key notes and drawings which I still have today, but having a big bonfire one evening at my neighbour’s place, with all the rest.
Some “video 8” film of the instrument remained, and I recently decided to finally go through all of that, and all the notes and drawings kept, and make up a YouTube video from it. This is what Greatbear Analogue & Digital Media has assisted with. I am very pleased with the results, and am grateful to them. Here is a link to that video: https://youtu.be/pXIzCWyw8d4
As for the future of the upright electric guitar, in the 20 years since ceasing work on the project, I have had a couple of ideas for how it could be redesigned to sound better and, for some of those ideas, to also be more practical.
One of these new designs involves using similar narrow 4-inch planks as on the final mockup described above, but adding the missing wood mass back onto this as “wings” sticking out the back – where they would not be in the way of string plucking etc – positioning the wings at a 90-degree angle to the usual plane of the body. This would probably be big and heavy, but it would be likely to sound a lot closer to what I have always been after.
Another design avenue might be to use 3 or 4 normal SGs and add robotic plucking and fretting mechanisms, driven by electronic sensors hooked up to another typical upright piano action and set of keys, with some programmed software to make the fast decisions needed to work out which string and fret to use on which SG guitar for each note played on the keyboard, and so on. While this would not give the same level of intimacy between the player and the instrument itself as even the original upright electric guitar had, the tone of the instrument would definitely sound more or less right, allowing for loss of “player feeling” from how humans usually pluck the strings, hold down the frets, and so on. This approach would most likely be really expensive, as quite a lot of robotics would probably be needed.
An even more distant possibility in relation to the original upright electric guitar, might be to explore additive synthesis further, the technology that the firm Musicom Ltd – with whom I collaborated during Approach 2 in the early 1990s – continue to use even today, for their pipe organ sounds. I have a few ideas on how to go about such additive synthesis exploration, but will leave them out of this text here.
As for my own involvement, I would like nothing better than to work on this project again, in some form. But these days, there are the usual bills to pay, so unless there is a wealthy patron or perhaps a sponsoring firm out there who can afford to both pay me enough salary to keep my current financial commitments, and to also bankroll the research and development that would need to be undertaken to get this invention moving again, the current situation is that it’s very unlikely I can do it myself.
Although that seems a bit of a shame, I am at least completely satisfied that, in my younger days, I had a proper go at this. It was an unforgettable experience, to say the least!


